With the sanding and finishing of the bodies completed I’m onto the blades and caps this week. My hope and, best guess, tells me that these shouldn’t take too long, but as with any new process hiccups can arise and making the bodies were no exception. Issues ranged from: tweaks to the best orders of operation, finding new angles, tools that are past their prime, hidden defects, and of course the ever-present risk that comes from placing a refined process in the hands of clumsy brute with the memory of a goldfish. But casualties aside they’re ready for blades and final test cuts.

Fingers scallops
So fortunately, I took a few photos for you all to see some specifics of the process. At this stage of the game there’s a tremendously high risk of screwing up weeks and weeks of work. One good slip of a tool or a trip over an extension core can bring you to your knees. Inducing apocalyptic levels of weeping and gnashing of teeth. Not that I would know but I’ve seen a guy do that…. Once the chip shoot, mouth, soles and main body of the tool have been dialed in its time carve out the finger scallops.
100 Grit sticky back sandpaper
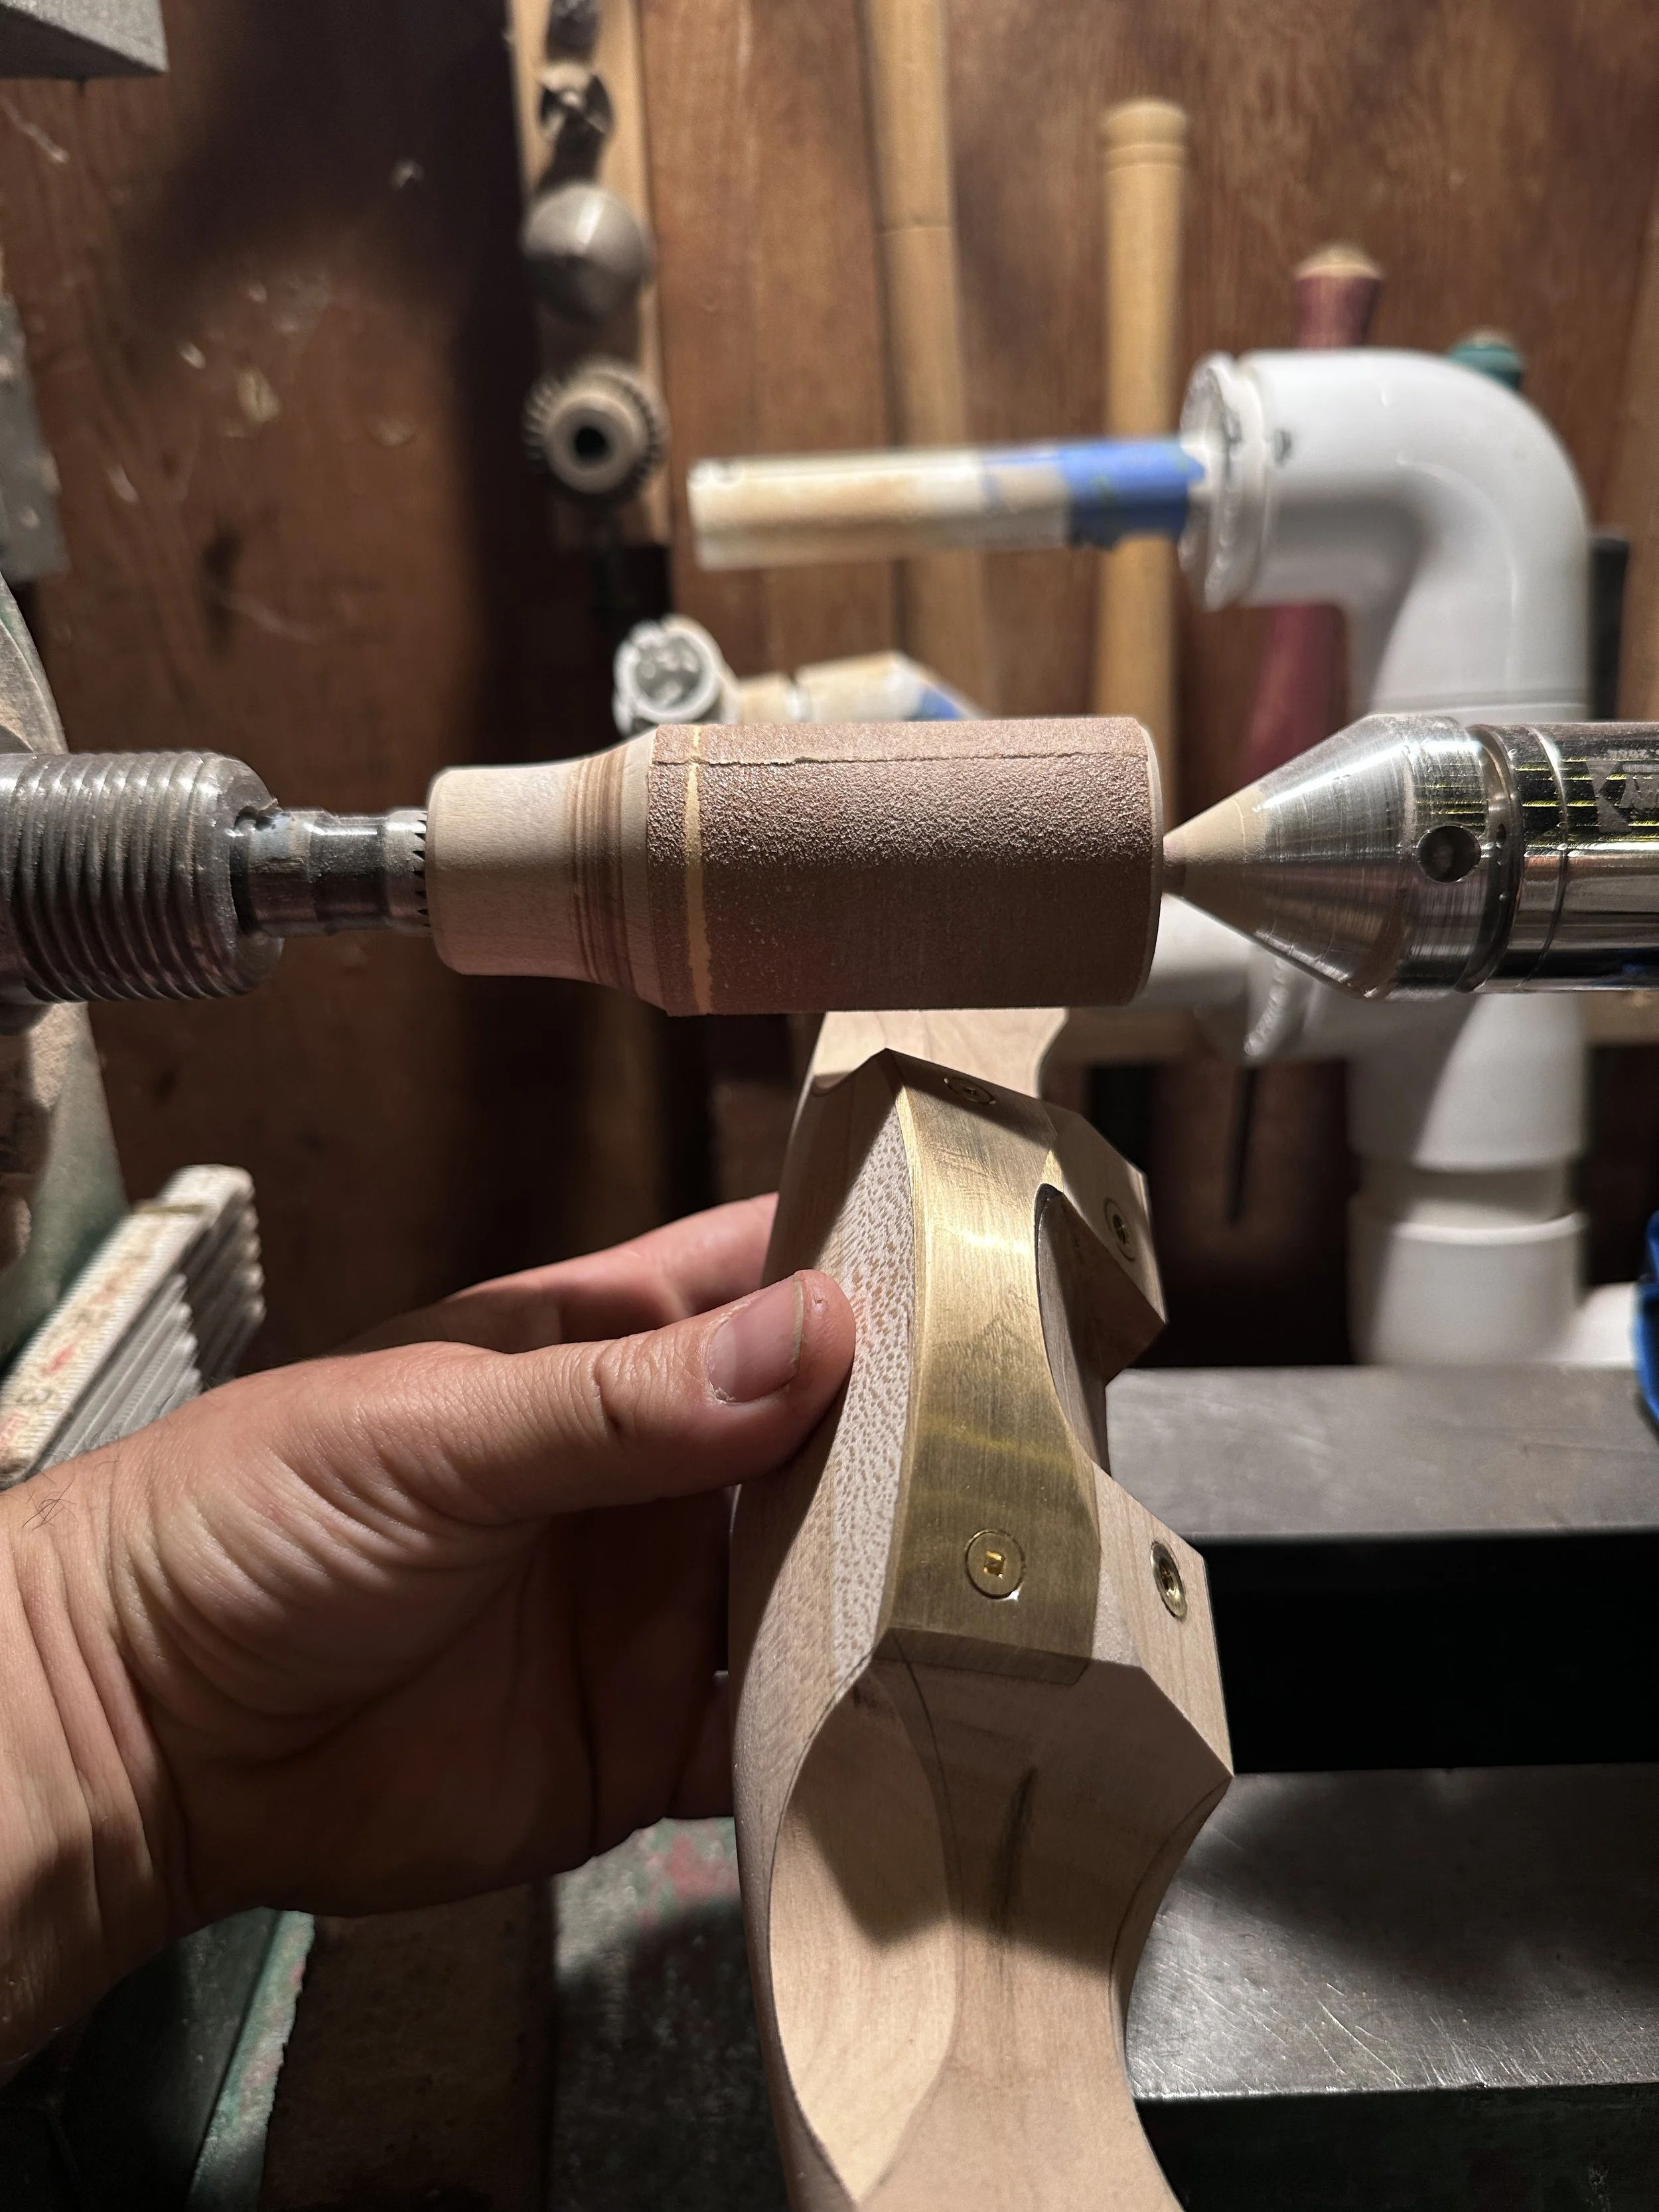
I begin by bulking out most of the material in that area with my sanding setup on the lathe. Its efficient and dusty, fast but perilous. One momentary loss in focus and you’ll have a travisher with an entirely new look and feel. What I heard Curtis Buchanan once call a, “design opportunity.” And seriously, I mean a moment of lost focus. Its amazing how difficult it can be to keep your mind trained on a single task. At times, I swear there was a saboteur in my head laying time delayed claymores. One moment I’m cooly and calmly carving a piece of cherry at 3000 rpms and next, I’m off into considerations of the tautological nature of praxeology. That’s when the mistakes happen… Thanks Mises…
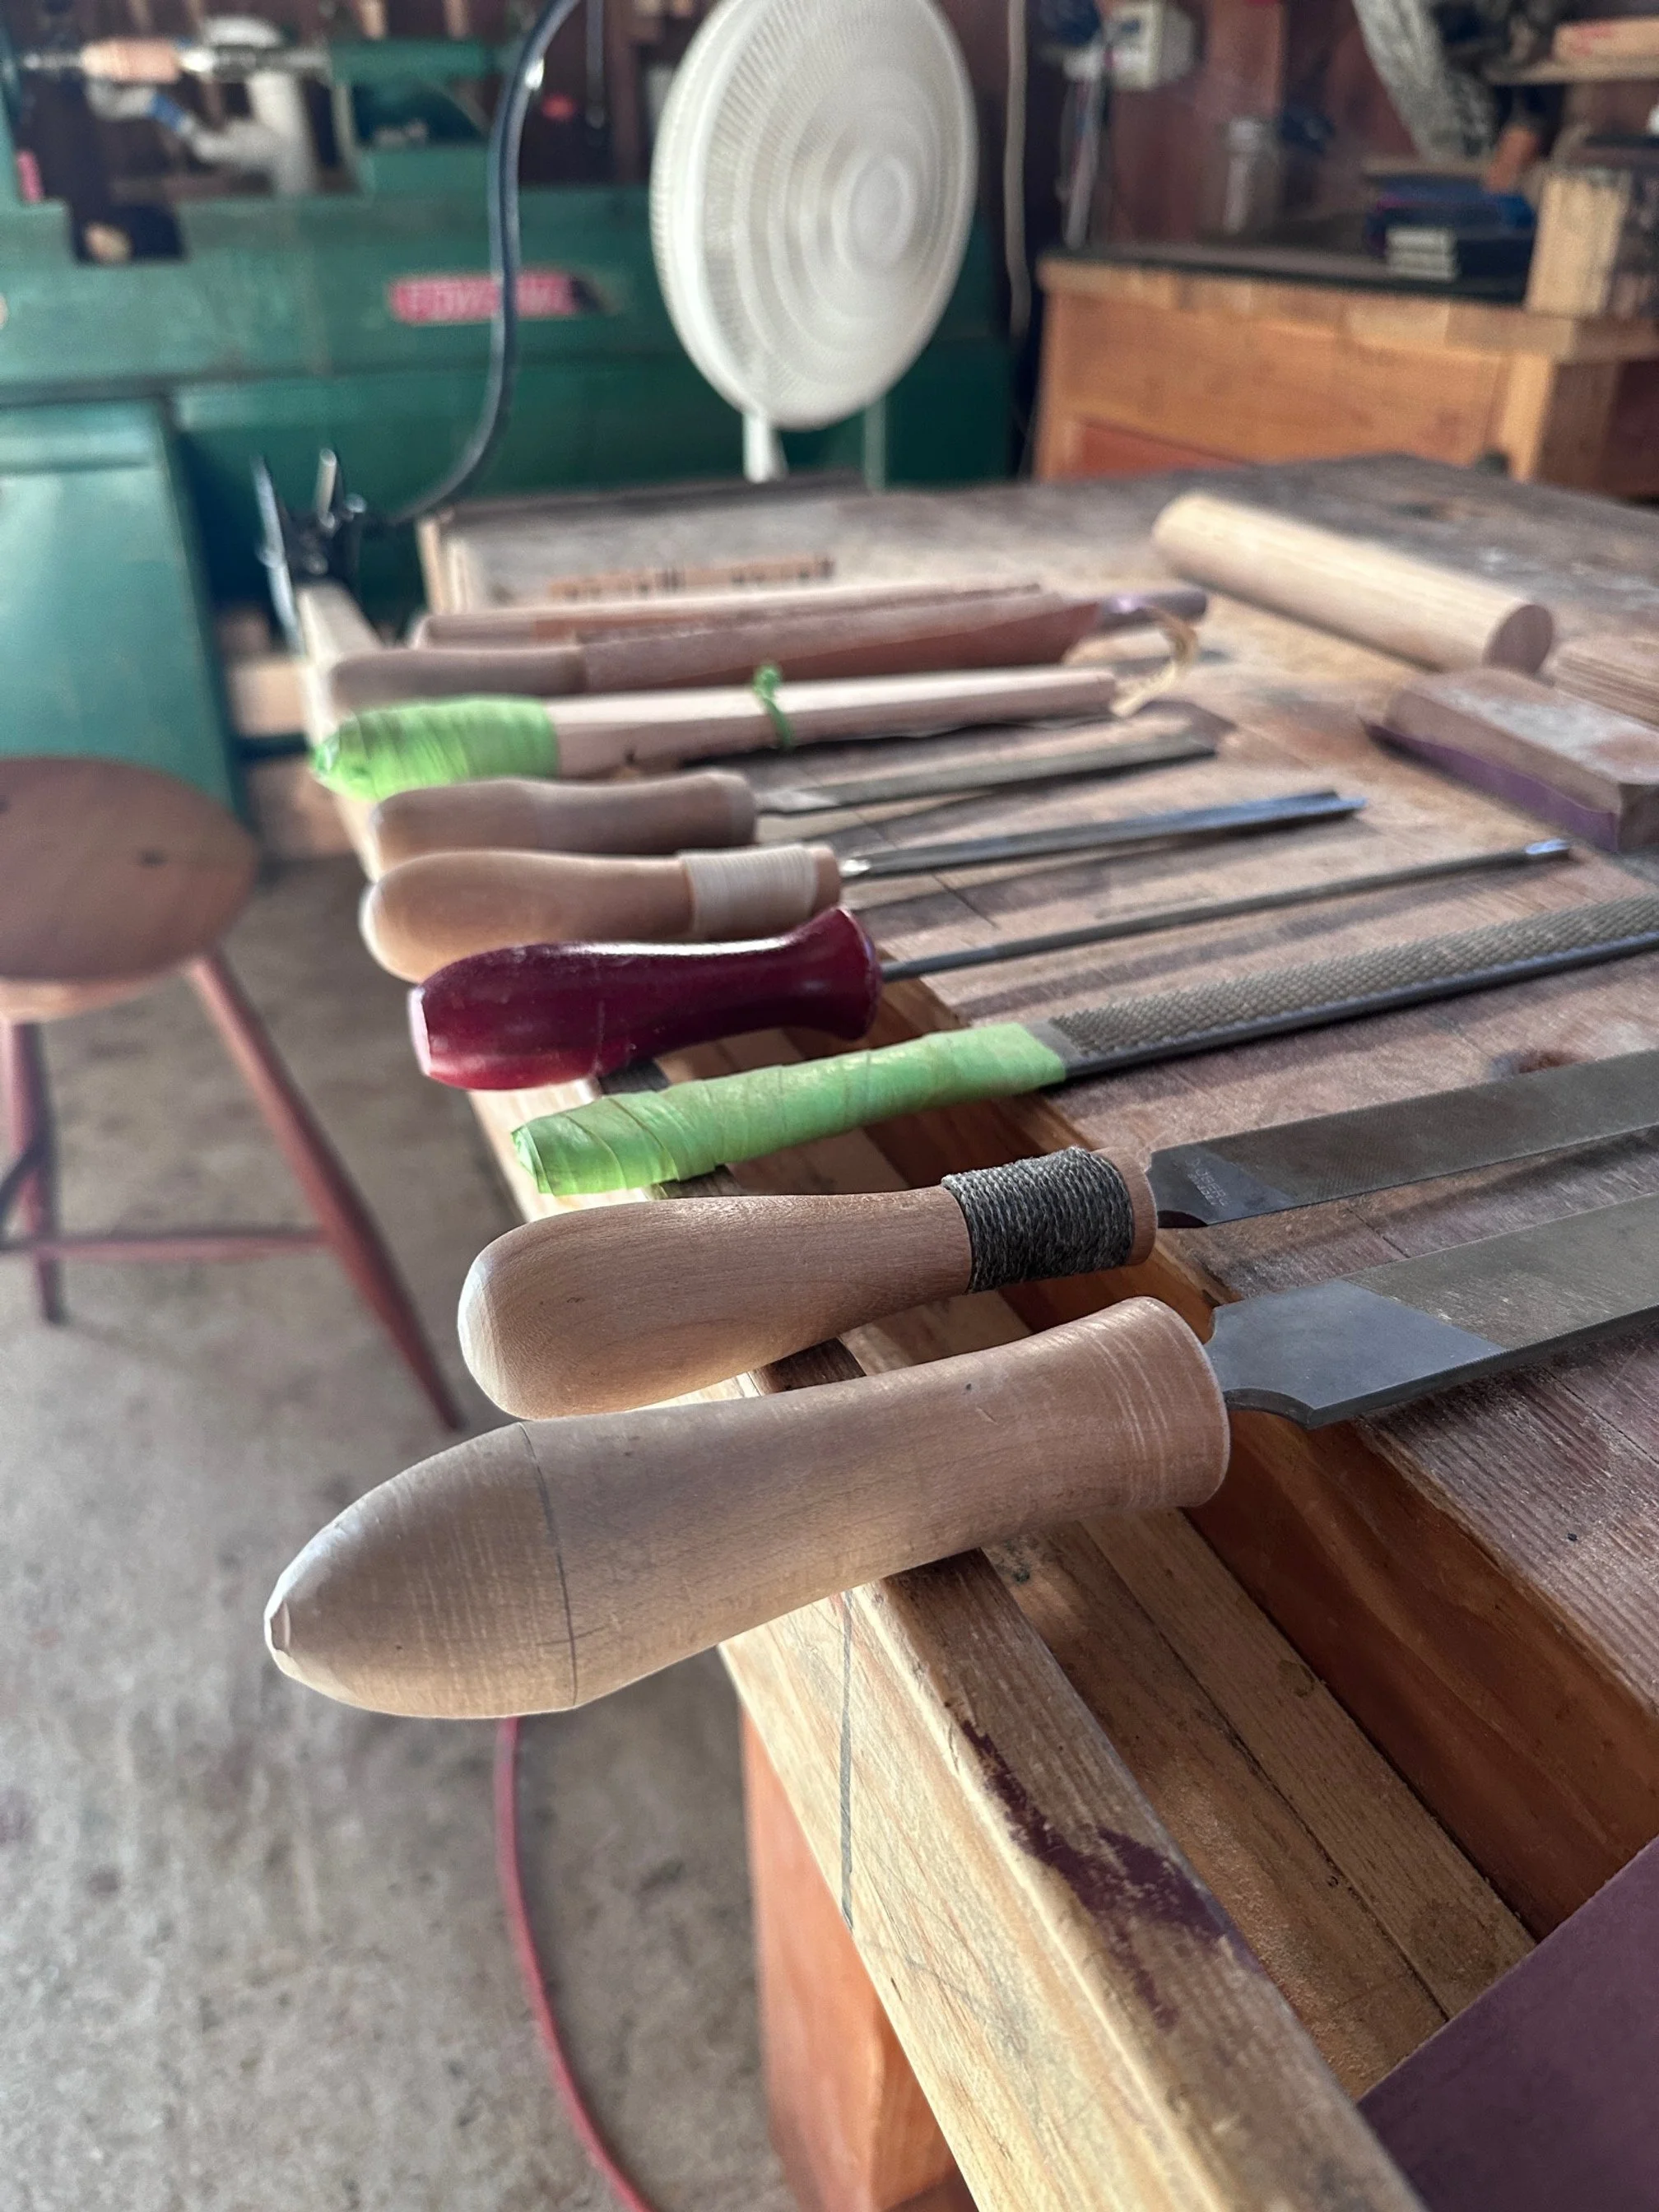
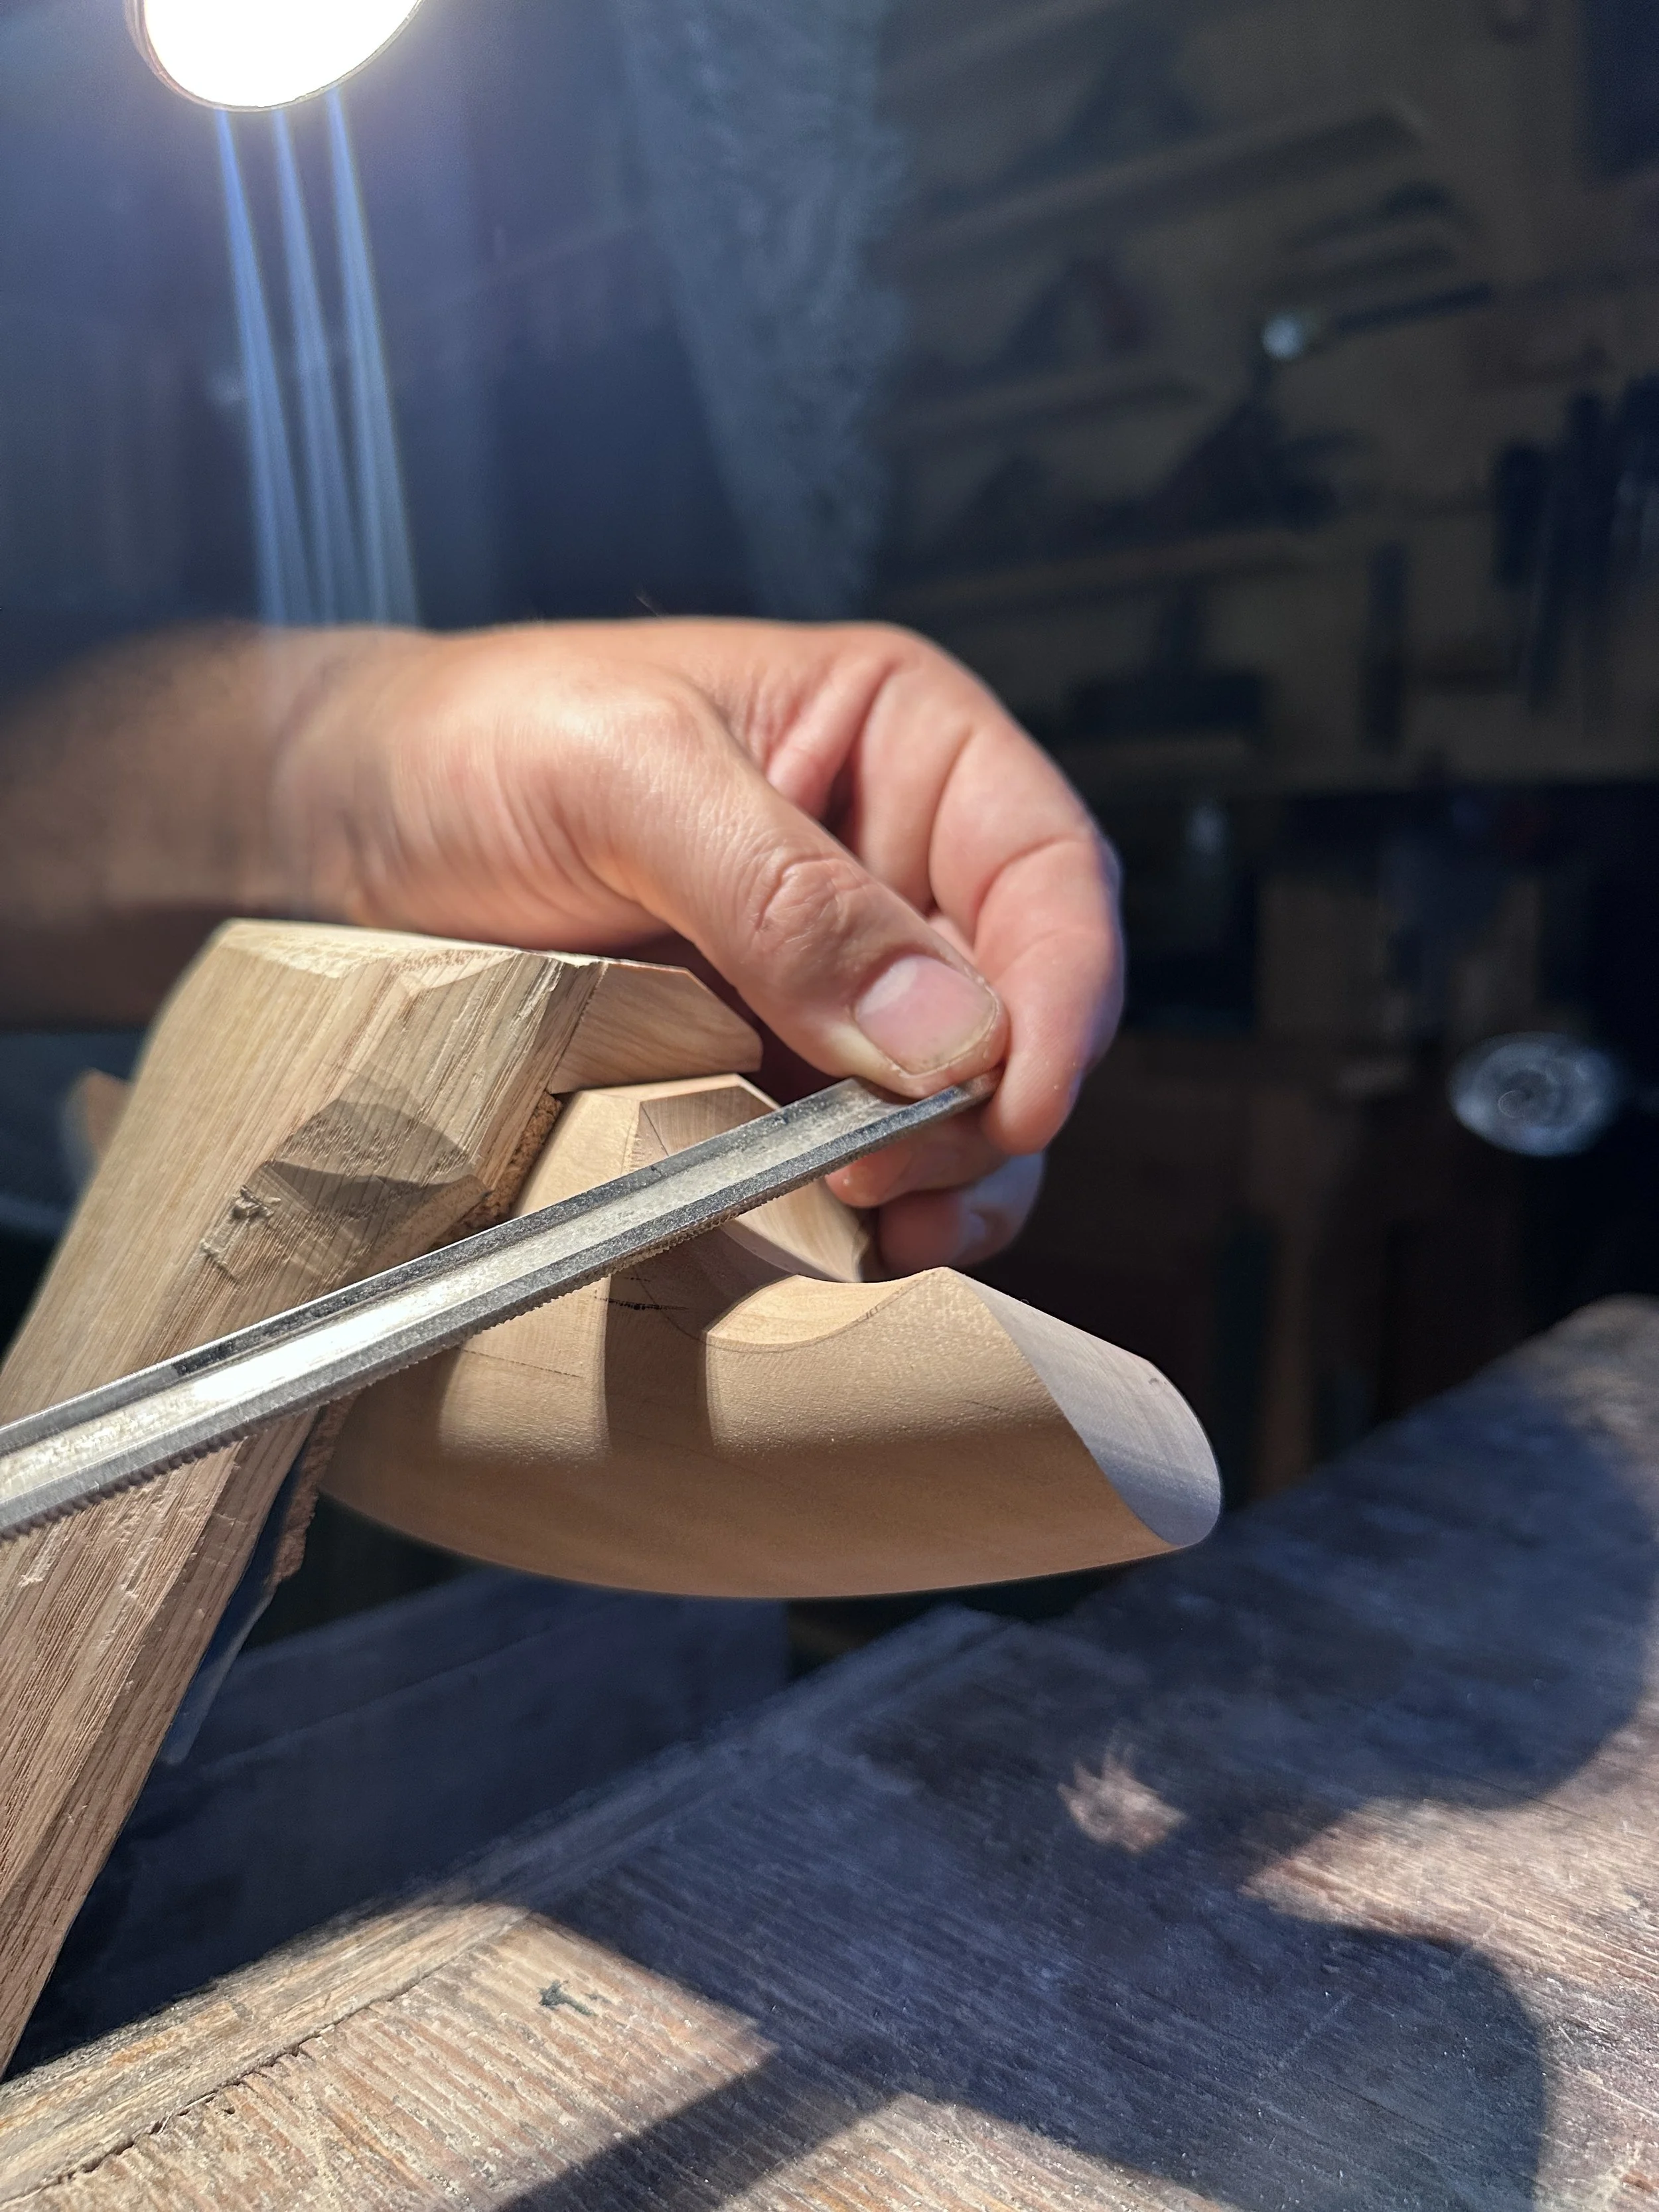
Once the bulking has been completed, I go through various stages of filing and sanding and if you haven’t tried them, the Iwasaki files from Japan they are awesome. Super sharp and actually take shavings rather than tearing out fibers pieces like a common rasp. These finger scallops have a slight convexity to them even though they look flat. So getting just the right amount of curve is important and after I’ve taken them 95% of the way with the files I use a couple dowels with 220 and 320 grit sandpaper. All of this looks pretty simple and it is but it demands patience to get it right, and that’s what I’m committed to. I want to make sure these tools not only function but are really nice.
Iwasaki file
I want the scallops to feel just right in your hands. As they transition up to the face and back of the tool those lines need to be crisp and define a hard shadow. The upper curve of the “palm swell” need to be smooth and have the right radius. Too sharp and you feel it. Too flat and there’s no support. It s deliberate balance of looks and something that just feels right.
So in closing, I can’t neglect thanking you all again for your support in this endeavor. Your patience through this process is deeply appreciated. I know you’re all excited to get these tools into your hands and I am equally charged to get them to you. - Ora et labora -
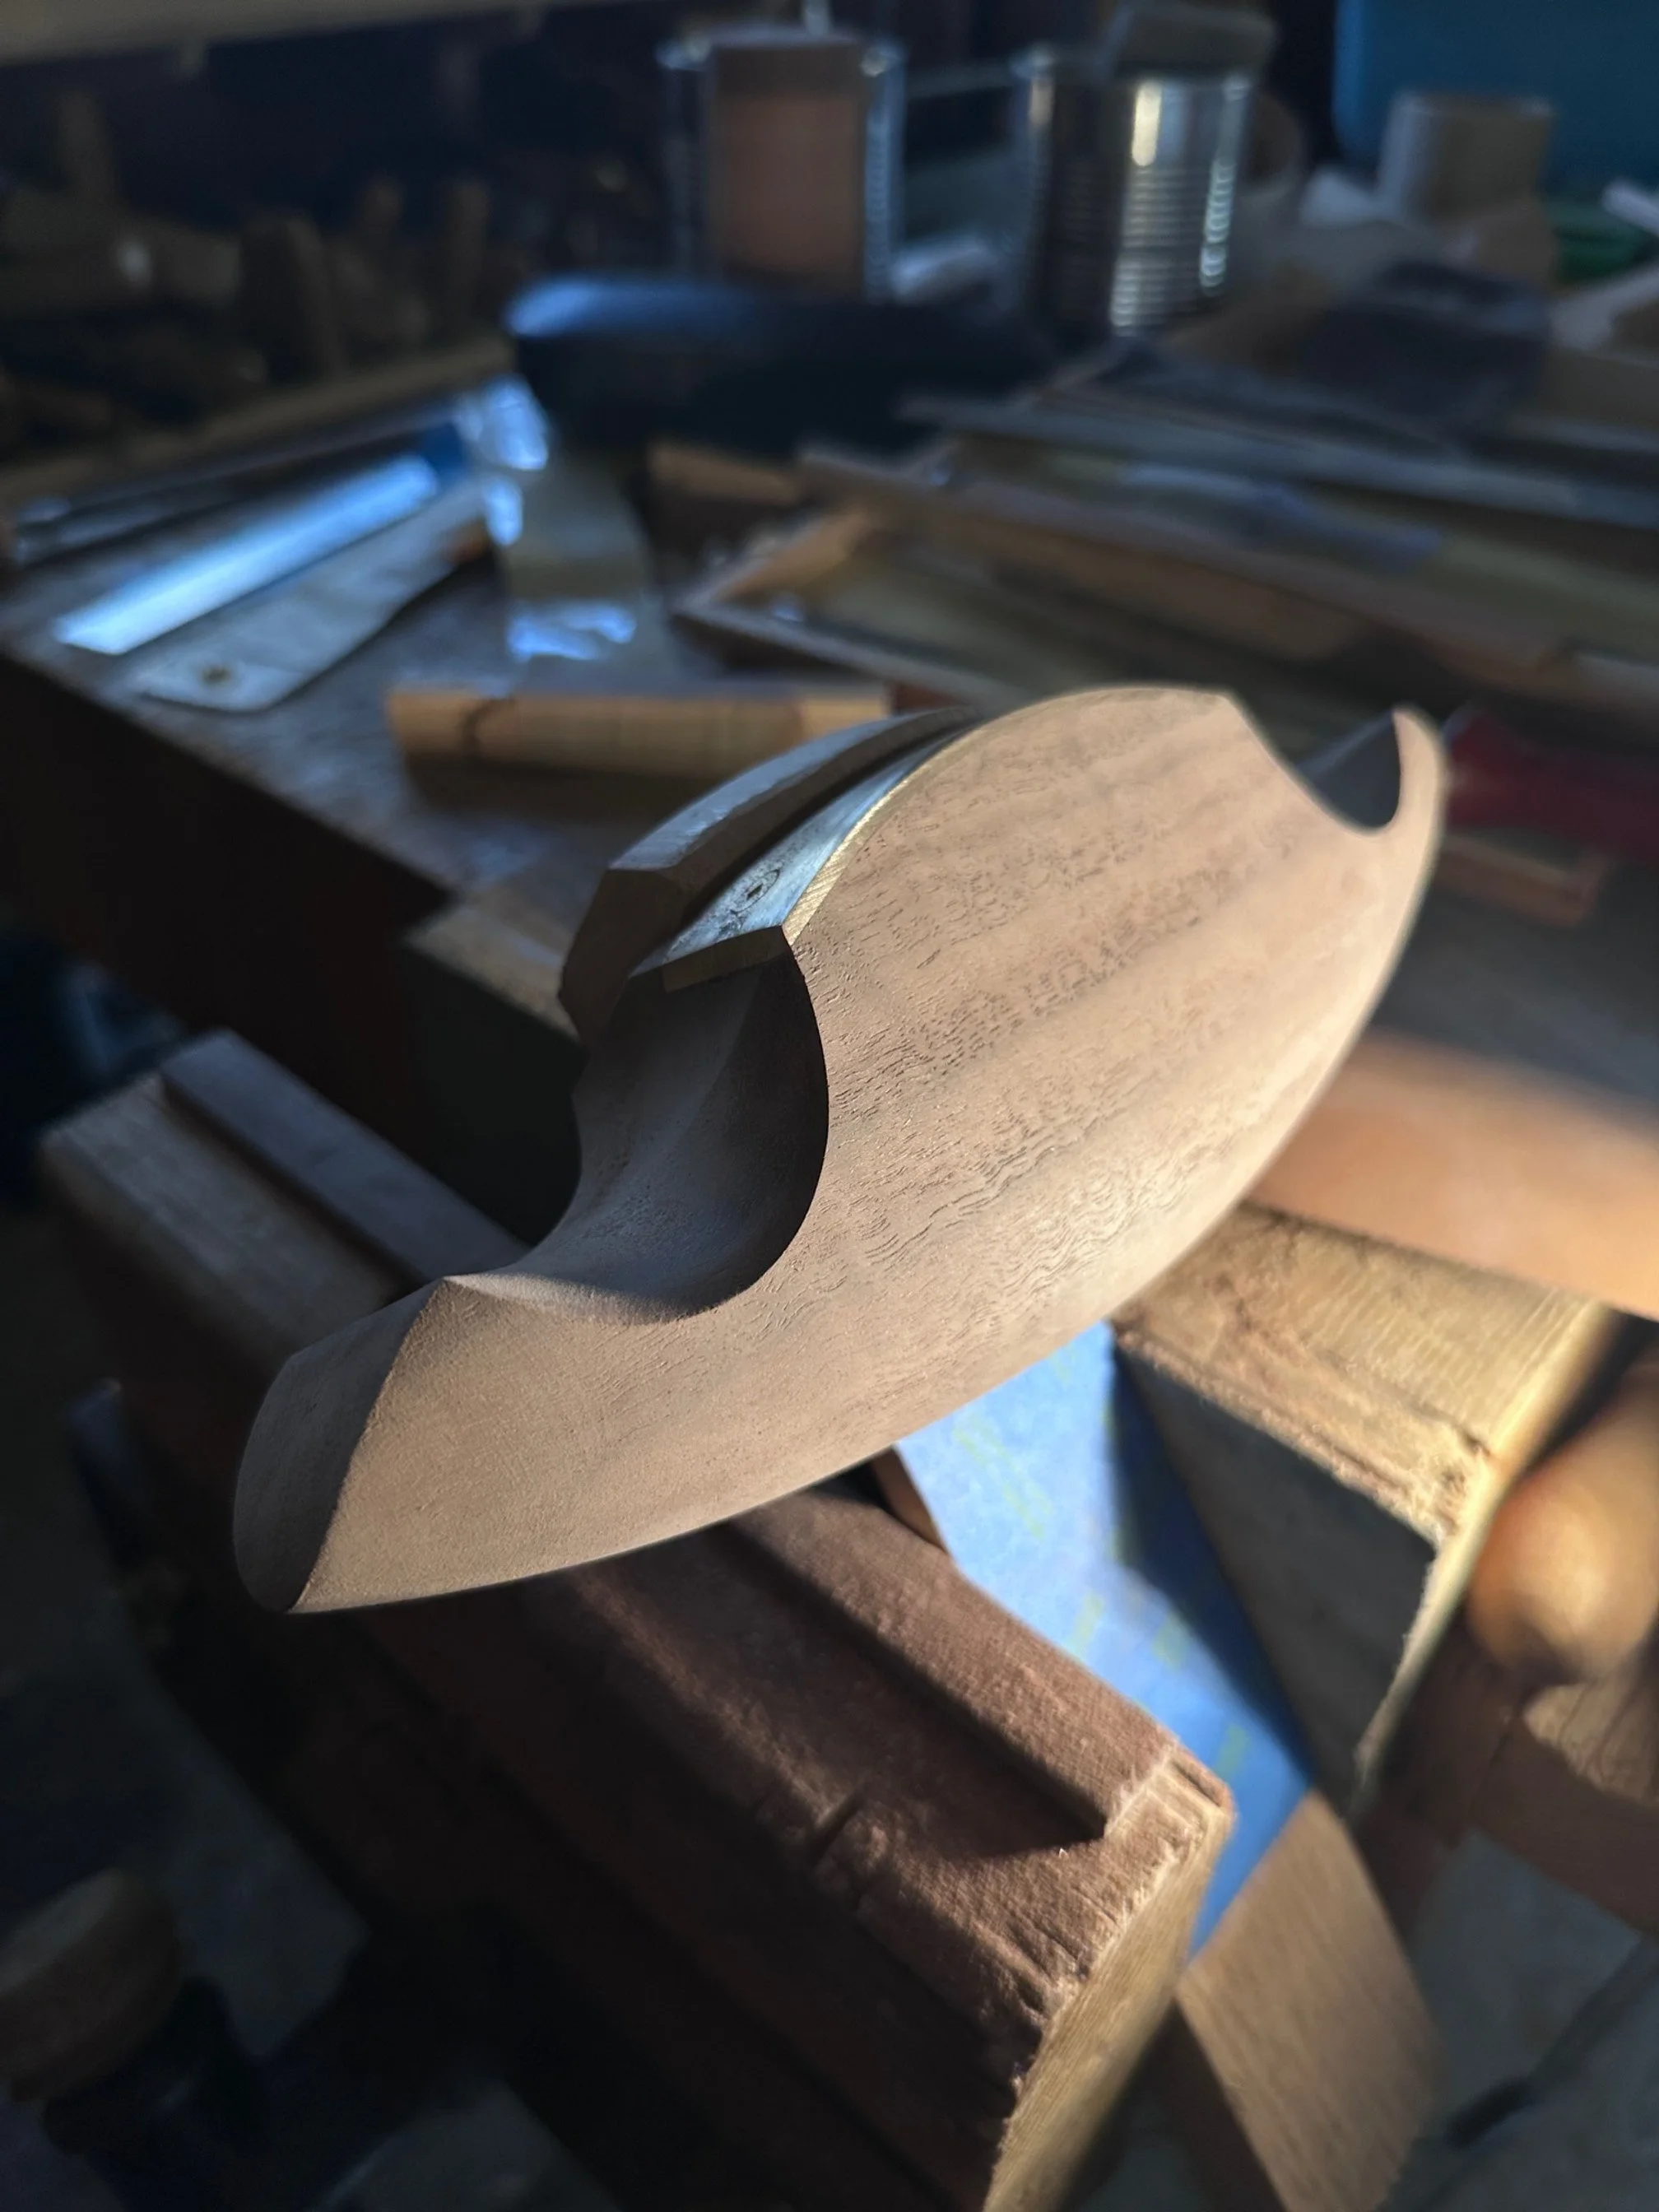
Crispy lines